Installing the Alarm Lock DL3200
Step-by-Step Guide with Wayne Winton!
Looking to upgrade your security by replacing an older DL2800 model? Join locksmith expert Wayne Winton as he walks you through the installation and re-handing process of the Alarm Lock DL3200 — a reliable, feature-packed option for commercial and residential applications. This blog highlights key points from his detailed video demonstration, where Wayne also installs an Interchangeable Core (IC) lock cylinder in the field without using a release hole. Watch Now!
Why Upgrade to the DL3200?
The DL3200 offers enhanced functionality and a more user-friendly interface compared to the DL2800. Some key benefits include:
-
Programmable PIN codes for multiple users.
-
Audit trail capability to track who accessed the door and when.
-
Increased durability and flexibility with field-configurable options.
Tools & Materials You’ll Need:
-
Phillips screwdriver
-
Allen wrench set
-
IC core installation tool (optional but helpful)
-
Replacement lock (DL3200)
-
Interchangeable Core (IC) cylinder
Step 1: Removing the Old DL2800 Lock
Wayne starts by carefully removing the old DL2800 lock from the door. He emphasizes:
-
Unfasten Screws: Use a Phillips screwdriver to remove all screws securing the lock.
-
Disconnect Wiring (if applicable): Gently disconnect any wiring connected to the old lock before detaching the lock body.
Pro Tip: Keep all screws and components organized in case you need them later.
Step 2: Re-handing the DL3200 Lock
One of the trickiest parts of this installation is re-handing the lock to match the door’s swing. Wayne provides a clear demonstration of how to:
-
Determine the correct handing by identifying the hinge position.
-
Reconfigure the lock to the appropriate handing using the internal mechanisms.
Important Note: Pay close attention to the direction the latch retracts to ensure smooth operation.
Step 3: Installing the DL3200 Lock Body
After adjusting the handing, Wayne proceeds with:
-
Aligning the Lock: Place the DL3200 in position and align it with the existing holes in the door.
-
Securing the Lock: Fasten the screws and ensure the lock is flush with the door surface.
-
Connecting Power (if required): For electronic functionality, connect any necessary wiring.
Step 4: Installing the Interchangeable Core (IC) Lock Cylinder
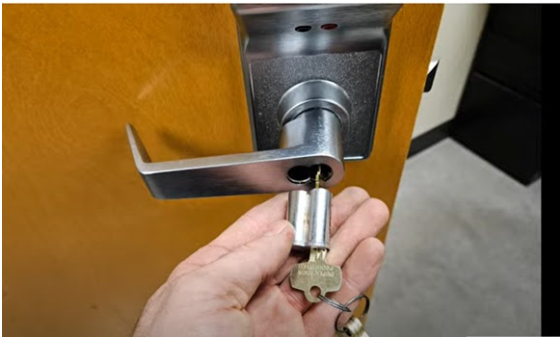
Here’s where Wayne showcases his pro skills by installing an IC lock cylinder without using a release hole! He walks viewers through:
-
Positioning the Core: Align the core properly within the lock body.
-
Securing the Cylinder: Rotate and secure the cylinder in place, ensuring it clicks into position smoothly.
Pro Tip: Double-check that the core is properly seated and functions correctly before proceeding.
Step 5: Testing and Final Adjustments
Wayne emphasizes the importance of testing the lock thoroughly to ensure:
-
All PIN codes work as expected.
-
The latch retracts and locks properly.
-
The IC core turns smoothly without resistance.
Final Thoughts: Why Choose Wayne Winton’s Installation Tips?
Wayne’s in-depth knowledge and practical approach make even the most complex installations easy to follow. Whether you’re a professional locksmith or a DIY enthusiast, his expert guidance ensures that you’ll have the DL3200 installed and functioning like a pro in no time.
Ready to upgrade your security? Get your Alarm Lock DL3200 and enjoy seamless, high-quality performance today!
SHOP NOW! https://www.keylessaccesslocks.com/search-results-page?q=DL3200


